Nice that you have decided in favour of VineForecast. You've now laid the foundations for your journey towards digitalising your outdoor operations. In this short guide, we'll explain how to set up your system so that you can get off to a smooth start. In the following six steps, you'll be all set up:
- Import or manually create plots
- Customise plot information
- Invite more users
- Create a virtual weather station
- Download app
- Test it out!
1. import or manually create plots 🚀
With VineForecast there are two ways to enter vineyards into your system. In addition to a simple import from your vineyard management programme, you can also create vineyards manually. After you have registered with VineForecast, you will first find the following page:
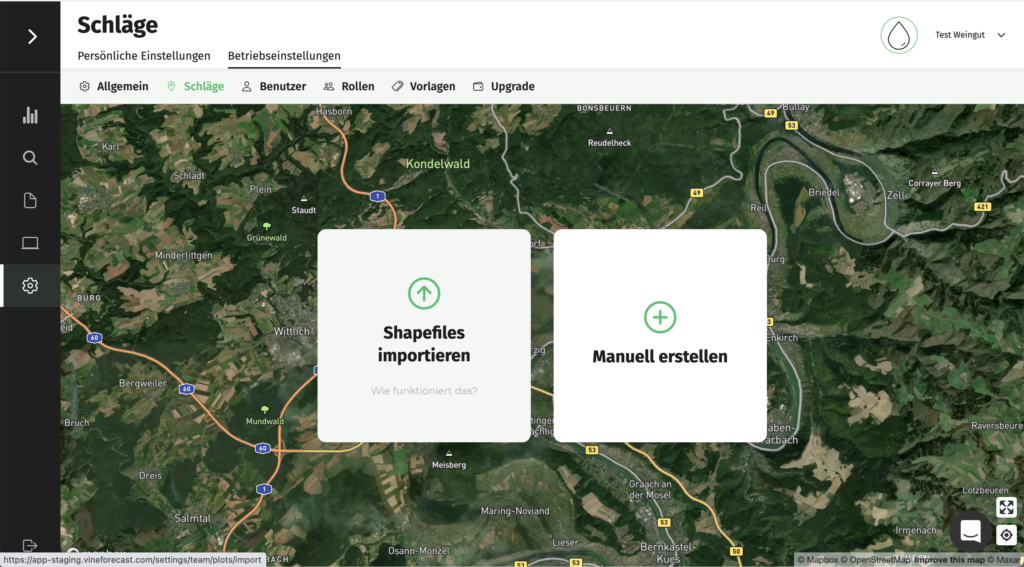
Import plots into VineForecast ⬆️
If you want to easily import your vineyards from your vineyard management programme, select "Import shapefiles" on the page shown above. So far you can import your vineyards almost everywhere in Germany and Austria. Click on the button with your federal state/country to get instructions for your region:
Is your country or state not yet included? Send us a short message to [email protected] and we will endeavour to find a solution for you as quickly as possible.
By importing, you have already done half the work for the setup and the field boundaries and coordinates of your vineyards are already stored in VineForecast. Depending on the federal state/country, more or less information can then be entered manually. How you can add the missing information is described below in this guide.
Draw plots manually in VineForecast ✍️
If you want to draw your plots manually, click on "Create manually" at the top of the page. You can then search for your location or the nearest town on the map using the location search at the top left of the map. As soon as you have found your vineyard, simply draw your vineyard on the map.
To anchor the marked field boundaries, simply click on the last corner point (green dots). This saves the field boundaries. You can adjust all field information on the right-hand side. You can also manually adjust the size in hectares calculated from the plotted field if it does not correspond 100 % with your field index.
Once you have entered all the information, click Save at the bottom. You have now successfully created your first stroke manually.
Tip: If you cannot draw new corner points with the mouse, simply click on the symbol above the rubbish bin at the bottom left of the map. You should now be able to draw new corner points again.
2. adjust plot information
If you want to adjust information such as parcel name, parcel number, district, grape variety, number and width of rows or year of planting, simply go to Settings -> Workspaces in the sidebar on the right on the cogwheel behind the plot name and size to edit the plot. You can now adjust all the information here.
3. invite further users 👋
It's time to add your team to the system. You can do this easily via Settings -> User do. Click on the left bar on "Invite new user". Then fill in the displayed fields and assign the appropriate access rights to the user.
There are three options for access rights. As Administrator the user sees all options in the app (e.g. for operations managers). As member the user can view everything except billing data and organisational settings (e.g. for foremen). With the Restricted access the user cannot make any important changes independently, but can only view and process tasks preset for them (e.g. for seasonal staff).
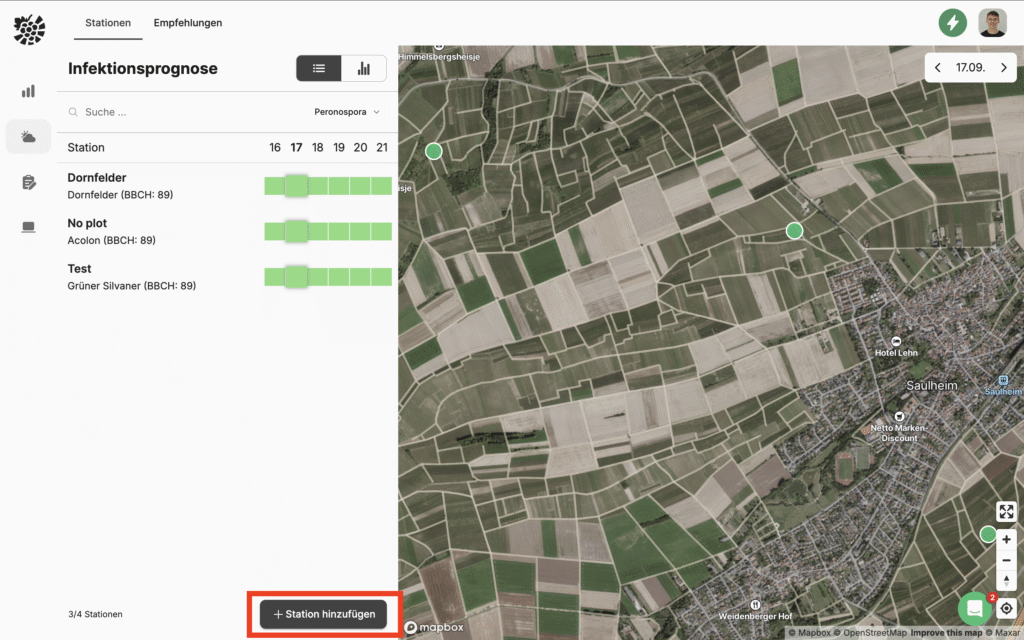
4. create virtual weather station ⛈️
To create your first virtual weather station at VineForecast, navigate to the menu item Forecasts -> Stations. Here you can click on the button below "Add station" create your virtual weather station.
After you click on the button, a window opens in which you can enter all the details for the station.
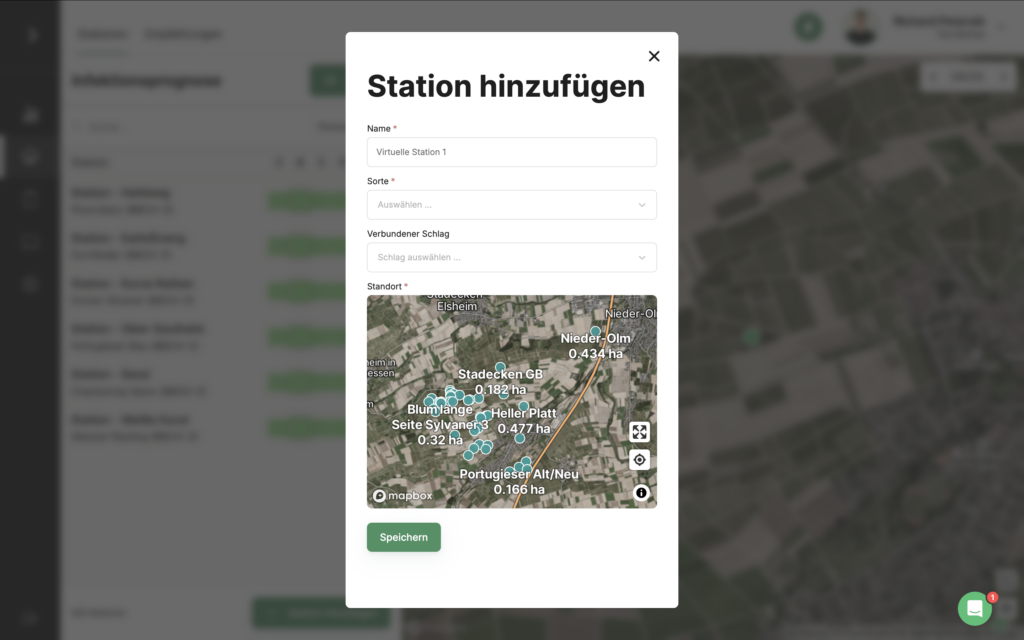
Now give the station a name and select a grape variety model for the station. Please note that VineForecast uses different models and the growth of the varieties is modelled differently. A Chardonnay, for example, will sprout somewhat earlier than most other grape varieties.
Also connect a vineyard to the station to receive recommendations for action. The virtual weather station obtains information on the last crop protection measures from the connected field and can then calculate a spraying interval in combination with the weather and disease forecasts.
You then need to specify the location of the station. Simply click on the desired location on the map.
Finally click on "Save". You should now be able to access the virtual weather station within 20-30 seconds.
5. download the app 📱
Once you have successfully completed steps 1-4, it is now time to download the VineForecast app. The following links will take you directly to the corresponding app for Android or iOS.
6. test it out! ▶️
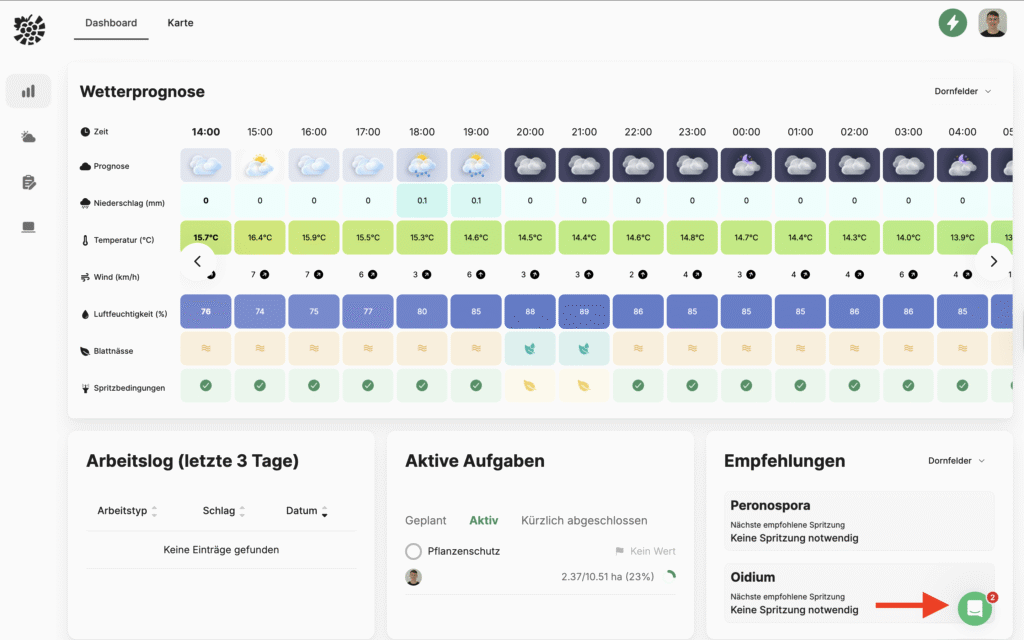
Now is the time to try out VineForecast! The first 30 days are completely free for you and you can test all the functions that are currently online. To get off to the best possible start, take a look at our instructions in the Basics on. You should then have all the basic knowledge you need to operate the software.
If you have any questions during the test phase or if anything remains unclear, please feel free to contact us via the support chat.